Download MicroSIP from the download URL:
http://www.microsip.org/downloads/?file=MicroSIP-Lite-3.14.5.exe
Install the application, according to the normal installation routine.
Once installed, start MicroSIP (Start -> MicroSIP -> MicroSIP)
Once started, configure your client:
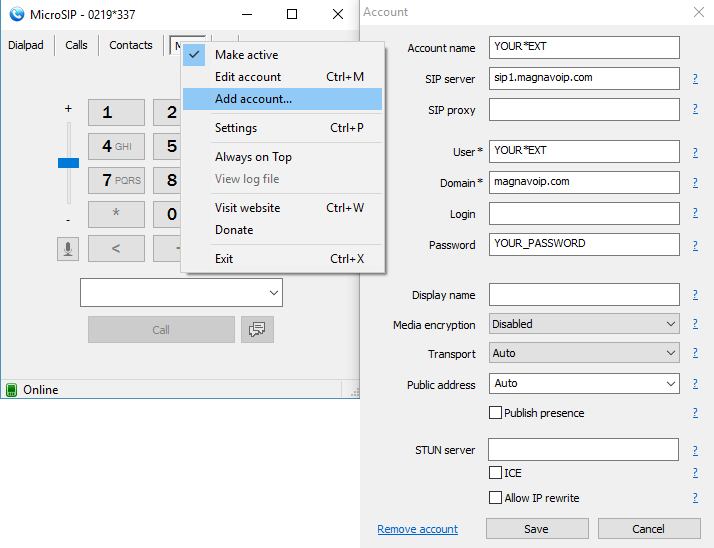
1. Click “Menu” -> “Add Account”
2. On the screen the pops up, you will need to fill in only a few boxes:
- Account Name – your full account number “XXXX*NNN”
- SIP Server – sip1.magnavoip.com
- User * - same as your account name, “XXXX*NNN”
- Domain* - set to “magnavoip.com”
- Password – set to your extension password
3. Click “Save” and you should see a green “Online” box at the bottom of your softphone.

** The default ringtone is pretty aggressive, you can change it by clicking on “Menu->Settings” and at the very top next to the “Ringing Sound” option, click the “…” to select a different sound file on your computer; the included “ringin2.wav” is a bit better than the default!

