This article will detail setting up an Adtran 904e (2nd Gen) or Adtran 908e (2nd Gen) for SIP Trunking. These devices would mostly be used as a PRI hand-off.
- We do not Support Adtran devices directly, but we do support the SIP Trunk connection between an Adtran and our Hosted Voice service. This guide is meant for reference only.
SIP Trunk
From your Option9 dashboard, navigate to SIP Trunks. Click on add a new SIP Trunk.
- We always recommend using the domain name as the name of the SIP Trunk.
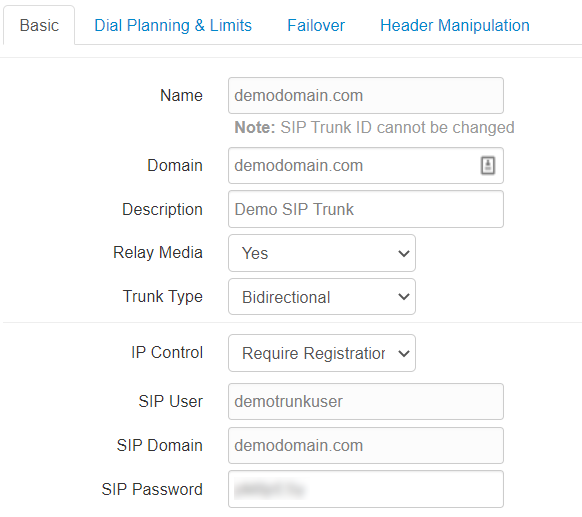
In this example we use
- Name - demodomain.com
- Domain - demodomain.com
- IP Control - Require Registration
- SIP User - demotrunkuser
- The SIP Domain and SIP Password will be automatically filled.
- On the next page, set your dial permissions strictly and click save.
Adtran Configuration
The Adtran Web interface is disabled by default, you will need to access the Adtran's CLI via console cable to enable the web interface. This guide will only entail information relating to the SIP Trunk set up.
Configuring the SIP Trunk
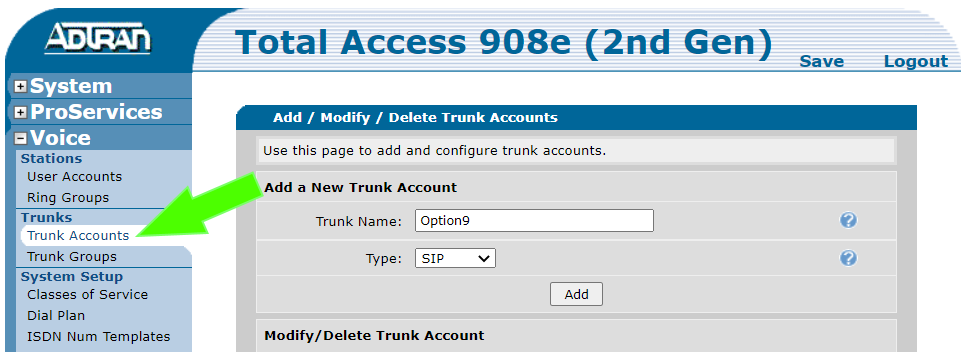
Navigate to Voice > Trunks > Trunk Accounts
- Trunk Name - Name your SIP Trunk (this name is for the Adtran interface only)
- Trunk Type - SIP
- Click Add, it will automatically take you to the configuration screen.
Use the following settings on the configuration page.
SIP Server Settings
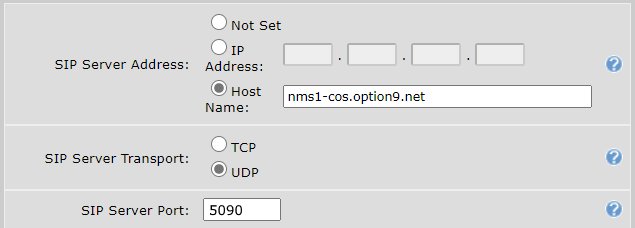
- SIP Server Address (Host Name) - {resellerid}.option9.net or nms1-cos.option9.net as a default
- SIP Server Port - although this is normally automatic, we use port 5090.
SIP Outbound Proxy Settings
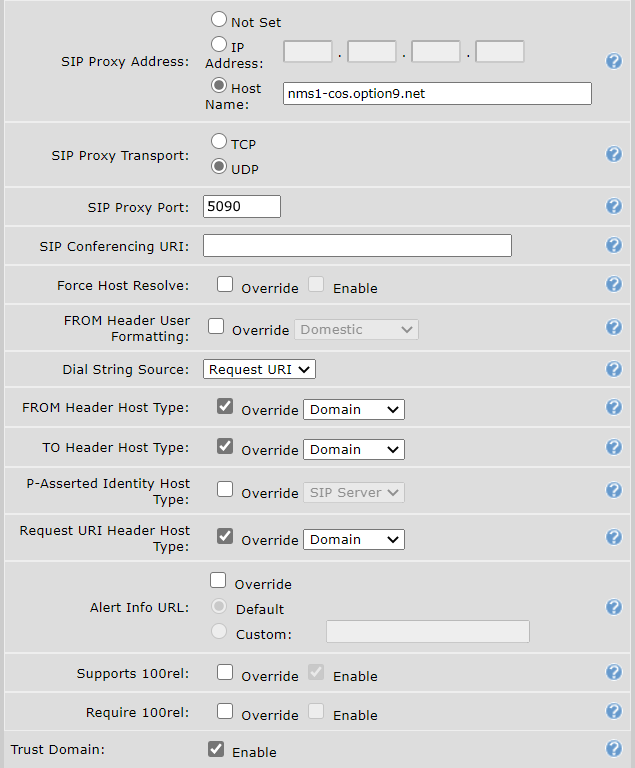
- SIP Proxy Address (Host Name) - {resellerid}.option9.net or nms1-cos.option9.net as a default
- SIP Proxy Port - although this is normally automatic, we use port 5090.
- From Header Host Type - Override (Domain)
- To Header Host Type - Override (Domain)
- Request URI Header Host Type - Override (Domain)
- Trust Domain - Enable
SIP Registrar Settings
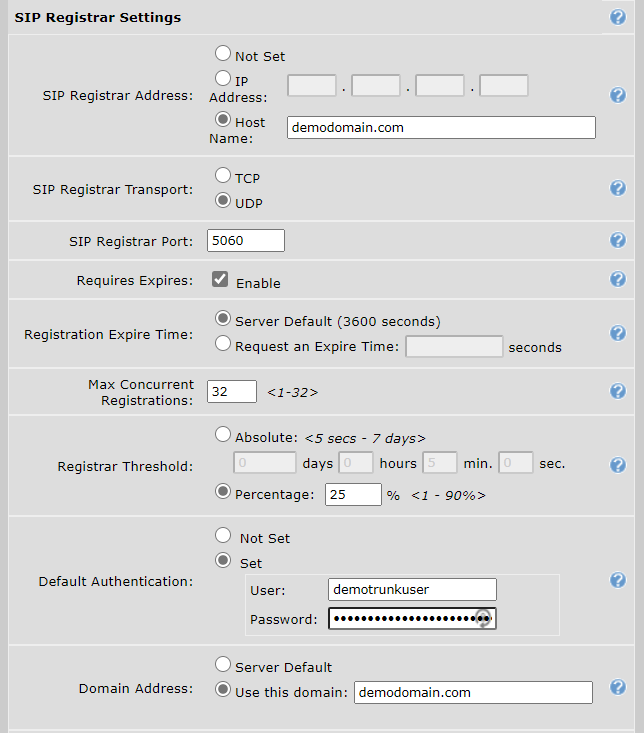
- SIP Registrar Address (Host Name) - {domain}
- Registrar Threshold (Percentage) - 50%
- Default Authentication- Set
- User - {SIP User}
- Password - {SIP Password}
- Domain Address (Use this domain) - {domain}
Registration Settings
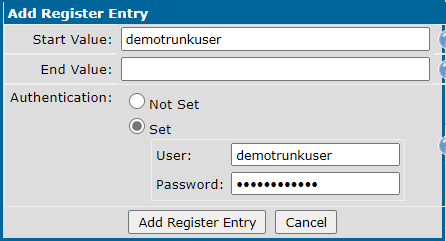
- Select Add Register Entry(Above the Cancel/Apply Buttons)
- Start Value - {SIP User}
- Authentication- Set
- User - {SIP User}
- Password - {SIP Password}
- Apply at the bottom of the page, and click Save at the top to Save the configuration
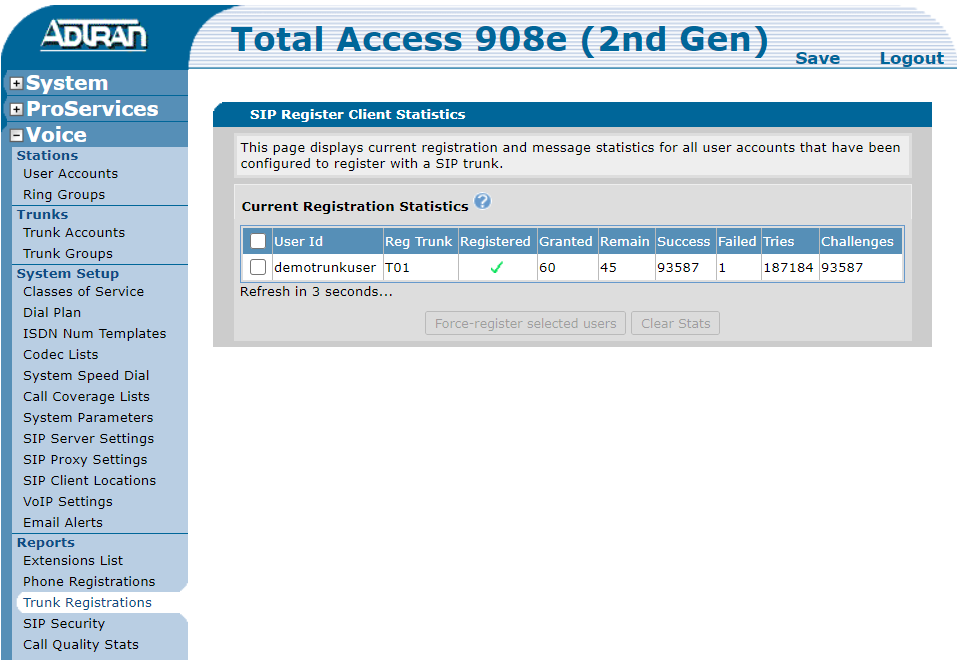
At this point, you should have successful registration, which can be seen under Voice > Reports > Trunk Registration
If your SIP Trunk failed to register and you have verified the steps above, you can troubleshoot further by selecting Utilities > Logging > Event History. The logs should lead you to the issue, which could be relating to your Network set up.
Trunk Group
To enable PRI calls outbound you will need to set up a Trunk Group.
Navigate to Voice > Trunks > Trunk Group
Under 'Add a new Trunk Group, create a Group name and click Add.

On the next page, select Add Members, and add the SIP Trunk that you created in previous steps. Then select the Outbound Calling Templates that will be used for this SIP Trunk. Apply and Save.

