- Download the Windows CDP agent onto your target server here: ServerBackup-Windows-Agent-x64.msi
- Double-click and run the downloaded Backup Agent. A reboot is required to successfully accomplish backups!
After installation is complete, you will need to add a key to the Backup Agent:
- Run the Windows Backup Agent Utility from the "Start" menu by clicking Start > All Programs (Programs) > Server Backup > Backup Agent Configuration Utility.
- The main program window is shown below:

3. The main window of the Windows Backup Agent Utility will be displayed. Switch over to the "Authorized Server Backup Managers" tab.

4. Click on the "Add..." button located on the right to authorize a Backup Manager.

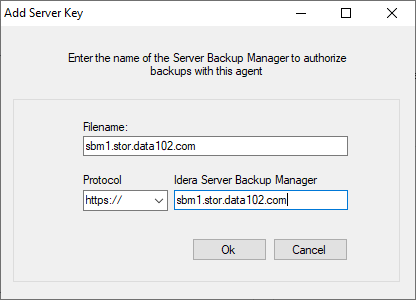
5. The "Add Server Key" dialog will be displayed.
6. Set the Protocol to HTTPS.
7. Set the Filename and "Server Backup Manager" to the same value: "sbm1.stor.data102.com" for Colorado, "sbm2.stor.data102.com" for Pennsylvania.

8. Once this information is entered and verified, the backup manager will be contacted to find its Public Key and the IP address that it will use for outbound connections. During this process, the Windows Backup Agent Configuration Utility uses the current Backup Agent port settings.
9. Press OK then OK to close out the agent!
Once the agent is installed and the key has been added as above, you will need to update your firewall(s) to allow access from our backup server to your server. You will need to add backups to the Windows Firewall, per the Backups Windows Firewall Setup Guide. If you have an external firewall like a Cisco ASA, Fortinet, NetScreen, etc, you will need to update your firewall configuration to allow access from our servers through to your server. This is outside the scope of this document.

